Thousand Mile Boots

Exploring The World One Mile At A Time

Month: May 2018

How to Ease Stress and Anxiety While Traveling

It always begins with fear, distress and dizziness. Then there’s the feeling you’re surrounded by too much noise or too many people. Shortness of breath follows afterwards and suddenly your…

It always begins with fear, distress and dizziness. Then there’s the feeling you’re surrounded by too much noise or too many people. Shortness of breath follows afterwards and suddenly your chest tightens. You squeeze your eyes, willing your breath to return to normal.

You’re in the midst of a panic attack.

Approximately 40 millions adults in the US have some form of anxiety, whether it’s general, social or set off by specific triggers.

Unfortunately, according to Anxiety and Depression Association of America, only 36.9% of suffers receive any form of treatment.

Traveling can be pretty stressful and it can become a nightmare if you have anxiety. You might not know where to go, how to communicate with people or how to get around in a new city – all of these things and more can induce some form of an anxiety attack.

I have anxiety, and panic attacks can become common while I’m traveling. I’ve even had them on the way to the airport!

I tell you this so that you will understand that the suggestions I give you below come from experience and should not be used as an alternative to proper medical care for mental health issues.

That being said, here are my suggestions for:

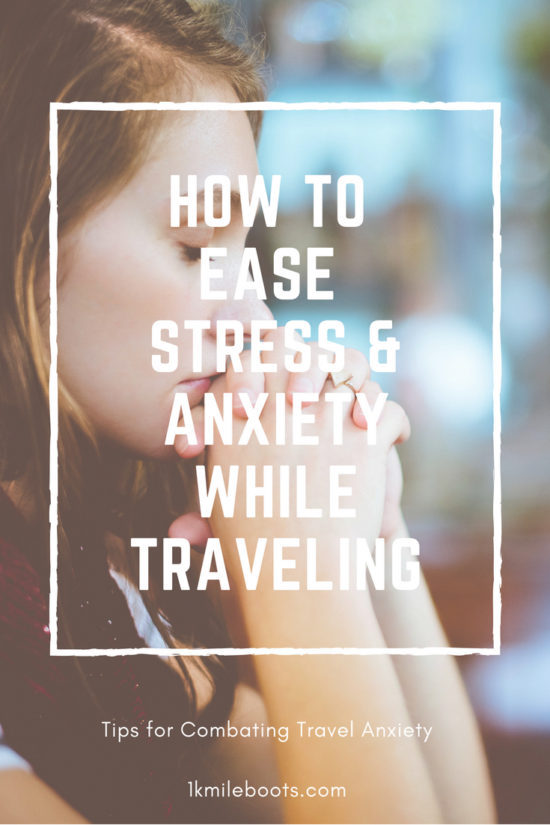
How to Handle Stress and Anxiety While Traveling


Attention: My post may contain Amazon affiliate links! As an Amazon Associate I earn from qualifying purchases.


Communicate with Your Travel Partner

helping anxiety stress

Let Them Know You Are Anxious

If you can feel the anxiety coming on let your travel partner know. Communication is your most powerful tool when it comes to anxiety. If caught early, you and your travel partner can work on making the situation easier.

Ask Them to Provide Assistance If Necessary

While they might not fully understand what’s going on, direct your travel partner as to what you need in order to feel safe and calm. That can be something like a quiet space, helping you with breathing exercise, giving reassurance or just providing small-talk & jokes as a distraction.

I find laughter to be an amazing anxiety and stress reliever. I’m very lucky my husband and travel partner is really good at it.

Understand Your Triggers

After you’ve had an episode or panic attack, try to assess what set it off – keep a running list if necessary. By understanding and knowing your triggers you can try to lessen the impact they have on you.

Triggers can include:

  • Hunger
  • Fatigue
  • Overstimulation
  • Large crowds

Once you know these what your triggers are, share this information with people you feel comfortable with. This way, they can take precautions to make travel easier.

Trust Your Travel Partner Has Your Back

People tend to travel with a companion, usually a friend or family member, so having support is always there.

This can be difficult if you’re traveling solo or with someone you don’t have a close relationship with, like a school group or a coworker. If that’s the case, try breathing exercises and calming meditation to help ease yourself back into a calm state. 

It’s also best to let your group leader know you have anxiety. Don’t feel like you have to be secretive about it – anxiety is common and your guide may have been trained to help you.


Plan Ahead and Be Prepared

prepare calm anxious

Make Sure to Cover All Your Bases

Being overly prepared is much better than being under-prepared. Perhaps it’s my years of camping & backpacking that has taught me this but having your bases covered always makes me feel more confident about my trip.

If you’ve read my post about preparing for your flight, you’d see that there are several things you can do to be prepared including double checking your itinerary, purchasing medical and trip insurance taken and providing someone close with your trip details.

Related: The Most Important To-Do List Before Your Flight

Keep Detailed Records and Print Out Tickets

Some people will become panicked if they cannot find their ticket. By keeping both physical and digital copies of tickets, itineraries and visas, you can diminish the likelihood of something like this happening.

I love using TripCase and Google Drive to handle things like tickets and my itinerary. They’re both easy to use and you can download everything so it’s easier to access if you don’t have WiFi.

Allocate Plenty of Time for Transportation

Give yourself enough time to get to the airport and choose a flight that allocates a decent amount of layover time so you can easily catch your next flight.

Stressing out because there’s traffic on the road or massive security lines will not help to ease you away from anxiety. You cannot control what happens around you but giving yourself ample time will certainly help you with how you react to those stressors.

Also, if you miss your flight due to delays or weather, most airlines will either reimburse you or move you to another flight.

Turbulence Can Agitate Anxiety

I get hit hard with this one as I’m a nervous flyer and become anxious at any bit of bumpy movement. I’m usually that person looking around the cabin with wide eyes, gauging everyone else’s reaction.

Normally I’m met with weird looks which, although doesn’t help me feel 100% better, does remind me that turbulence is a normal part of flying.

And flying still remains the safest form of transportation.

When turbulence does occur, I usually turn to my partner for some reassurance and idle chit-chat until the bumping has passed. For me, this always works.

Bring a Comforting Item or Two With You

Whenever I travel to somewhere new I like to bring something comforting with me. Sometimes that’s a warm scarf that smells like home or my favorite perfume.

Find something that you love, something that evokes happy or calming memories, and bring that with you. Just remember to keep it small so it’s easier to carry.

Whenever you feel anxious or stressed out, pull out that item and know that you’re safe.


Make Sure to Take Care Of Yourself

girl meditation

Get Plenty of Sleep the Night Before

Though it might be difficult, getting 8 hours of restful sleep the night before your trip can really help with anxiety. According to Anxiety.Org,  Sleeps allows your body to recharge, heal and relax – all of these help with reducing stress and anxiety.

When Alex and I traveled to Morocco (my first international trip), I didn’t sleep the night before or during our flights. Basically, I went 30+ hours without sleep!!!

That made me irritable and every little thing caused me distress. I ended up having half a dozen panic attacks in just a span of days. Not my idea of fun.

Try gentle yoga, reading or drinking a calming tea. Talk with your doctor before taking any sleep aids.

Eat a Nutritious (Not Heavy) Meal

Eating a light, healthy meal not only helps to keep hunger pains away but also provides your body with the fuel it needs for travel. And if you’ve ever been hangry before, you know that it can lead to confusion, irritability and fatigue.

This is why having small snacks or a light meal can set you on the right path for travel.

I like to eat a protein rich meal, like scrambled eggs, before heading to the airport and then refuel with snacks like apples, salted cashews, trail bars and gummies.

Related: Long-Haul Survival List

Splurge on a Treat

You’re heading out on vacation, why not grab a little extra treat to make the flight more enjoyable? Perhaps it’s your favorite gummies, or a new movie downloaded to your tablet or even a gossip magazine!

Chocolate is my go-to treat for a long flight. I don’t just get any normal chocolate, I splurge on the higher quality stuff and make sure to savor every bite.

If you’re a choco-holic like me, grab some delicious dark chocolate which contains antioxidants and is better for you than milk chocolate.

Of course, whatever your treat may be, moderation is key.


Staying Hydrated is Extremely Important

glass water dehydration

Planes are Notorious for Being Dry

Ever get up in the air and noticed that your lips are chapped or your hands are dry? Planes are notorious for having dry air. This is because the air is recirculated throughout the cabin – basically, there’s no fresh air. Ew!

This means you will need to drink more water than normal while flying. Keeping hydrated is extremely important to your body and mental health. When you become dehydrated you being to feel dizzy or faint which can trigger a panic attack.

Avoid Caffeine and Alcohol if Possible

During flights, particularly long-haul or international flights, coffee and wine are free…and in abundance. While it might be tempting to have one or the other with a meal, those who suffer from anxiety are better off without.

Not only will both dehydrate you, they’ll also increase your heart rate which can lead to increased anxiety.

Too Late, Here’s A Panic Attacks

If you’re in the throws of a panic attack, and you cannot calm down, it may better to let the episode run its course. Most panic attack only last a few minutes and subside quickly – although it leaves you shaky.

By fighting the attack you might be delaying your body’s ability to calm yourself down.


Try Calming Yoga & Meditation

girl meditating calm

Middle Seat Yoga

You’ve heard that yoga is a pretty good workout but it’s also really calming and restorative for your mind & spirit. Gentle yoga helps your body to release stress and tension which reducing the heart rate and increasing good chemicals in the brain like endorphins.

If you’re on a plane, doing yoga might be a little difficult but not impossible.

Try twisting your torso to the left and right, holding for a few breaths and then slowly releasing. You can also bend your head forward, gently placing your hands behind your head to increase the stretch. Breathe through your mouth, not your nose.

Be sure to not stretch too far so you don’t injure your neck – you want a gentle, relaxing stretch.

Another great stretch is to stand in the aisle (perhaps while waiting for your seatmate to come back from the lavatory?) and bend forward, allowing your head, neck and arms to be loose. Try reaching for your toes, if you can, but otherwise, hang loosely.

Do this a for a few breaths and slowly roll back up, one vertebrae at a time so you do not become dizzy.

Meditation and Breathing Exercises

Breathing is essential for humans, we all know that, but learning to control your breath may help save you from a panic attack. At least it will help to calm your nerves and slow your heart rate.

What I try to do is visualize a balloon inside my belly. I inhale slowly for 8 seasons, letting the balloon of my belly grow larger, hold it for 3, and then release it for 8 seconds so it deflates.

Meditation is also a great way to relieve anxiety but it does involve some practice. While there are plenty of meditation methods, no one way is right for each individual so try whichever methods work best for you!

One method I like uses imagery. Begin by closing your eyes and imaging a safe, peaceful place: perhaps a beach with calming waves or a sunny meadow. Try tuning out everything around you. If you’re having a hard time, find a more quiet spot and repeat the process again.

In your safe place, imagine your are floating or at complete peace. When you feel comfortable, open your eyes and hold onto that feeling.


you got this


I hope these suggestions will help you the next time your anxious or stressed. I do my best to explain anxiety but the experience isn’t the same for everyone and it’s definitely frustrating to explain to someone who doesn’t have anxiety.

Though I have anxiety, I don’t let it control my life or my travels. I don’t let it set me back because I know I can control it with practice and help.

Just remember that your anxieties and feelings are valid, even if no one else understands. You’re strong and you will get through it.

Have a suggestion on how to handle travel anxiety? Leave a comment below!


11 Comments on How to Ease Stress and Anxiety While Traveling

Easy Dehydrated Strawberry Chips

It is late spring and that means southern California is inundated with millions of glorious little red gems – the strawberry! I mean this in the literal sense as you…

It is late spring and that means southern California is inundated with millions of glorious little red gems – the strawberry! I mean this in the literal sense as you can pick up pound of these ruby beauties for about 75¢ a pound.

That being said, my house always has strawberries. Whether it’s fresh, dried, canned or frozen, they are within reach.

Besides being eye catching, the strawberry is also considered a superfruit. They are jam-packed with vitamin C, potassium, fiber and antioxidants which means they’re good for your heart and overall health.

strawberry red fruit superfruit


They apparently help with cancer prevention as well! So strawberries being labeled as a superfruit no longer surprised me. 🙂

When the fruit is dehydrated, or dried, you still retain many of these nutrients which makes them terrific snacks for backpacking, camping or just daily running around.


Attention: My post may contain Amazon affiliate links! As an Amazon Associate I earn from qualifying purchases.


So when a good friend asked how to dehydrate strawberries, I jumped at the chance to explain how easy it was and what delicious results drying would yield.

Her question was also perfectly timed as we were preparing to head out for a 2 day backpacking trip to Cottonwood Lakes in the south eastern Sierra mountains.

What better way to enjoy spring than with sunshine, majestic mountains and sweetly tart, dried strawberry chips!

So let me show you how easy it is to create… 


Dehydrated Strawberry Chips

pinterest dehydrated strawberry pin

Ingredients/Tools:

Instructions:

You will want to look for strawberries that are fresh but not overly ripened since you’ll need them to be firm. Firmer strawberries will be easier to cut but you can still get away with this using ripened strawberries.

strawberries book dehydrate

Related: Easy Dehydrated Pineapple


Fully wash the strawberries and let them sit for an hour to dry. If you are crunched for time, pat them down with a paper towel.

Once the strawberries are dry you can begin cutting them into ¼ or ⅛ thick slices. There’s two different cuts you can make, neither are wrong.

slice horizontal strawberries red


Horizontally will give you round chips, vertically will give you pretty strawberry shaped ones. I thought vertical cuts were faster but it’s up to personal preference.

vertical strawberry slice


Once finished, spread the strawberry slices out on your mesh sheets and place into dehydrator.

strawberries slices red fruit


Pro-tip: Wash out your dehydrator if a cat has previously used it as a napping spot.

cat dehydrator


Set your temperature at 135°F/57°C, dry for approximately 10-18 hours depending on you humidity level. Higher humidity requires longer drying time.

dried dehydrator strawberries slice


Store in airtight container, keeps for 1-2 months.

dried strawberries dehydrator


The final product should be these beautiful strawberry chips which you can use in granola, oatmeal or by themselves. Yum!

Related: Easy Dehydrated Pineapple


Bonus Tips!

  • Don’t use a wooden cutting board if you can help it. I’m still trying to get strawberry juice stains out of the wood. Plastic is better.
  • If you find that some of your strawberries have mushy spots, either cut around them or reserve those for jam or smoothies.
  • Add a splash of lemon juice for extra zing!

What do you like to add dried strawberry slices into? Leave your thoughts or ideas down below in the comments. 🙂


1 Comment on Easy Dehydrated Strawberry Chips

Long-Haul Flight Survival List

If you type in “carry on items for long-haul flight” you’ll get thousands of hits and tons of suggestions. Bring this, bring that, don’t bring this, keep that at home…….

If you type in “carry on items for long-haul flight” you’ll get thousands of hits and tons of suggestions. Bring this, bring that, don’t bring this, keep that at home…. It can be really confusing to figure out what you should bring to keep yourself comfortable and entertained.

So I’ve decided to put together a list my own! Why? Because I’ve tried all these out and I know what works.

Here’s my take on the…

Long-Haul Flight Survival Gear List


long-haul pinterest pin


Attention: My post may contain Amazon affiliate links! As an Amazon Associate I earn from qualifying purchases.


Photo by freestocks.org from Pexels_Small

Gastro-Pak – My Lifesaver:

Prescription Medicines

Consult with your doctor to make sure you get the proper pill count – you’ll need whatever is necessary for your trip, plus a few extra, just in case you miss your flight or are delayed in getting home.

If you require a liquid medication, like insulin, you’ll need a signed letter from your doctor explaining what the medicine is (especially for sharp objects like needles).

Gastro-pak in Clear Case

Ever since I began traveling internationally I’ve brought along a gastro-pak. Plane rides mess with your body’s natural functions and cabin pressure can cause issues like bloating and headaches. Not to mention you might also be adjusting to different time zones which can seriously mess with your metabolism and gut.

Hence, a gastro-pak comes in handy.

There’s no right or wrong way to pack one of these, it’s all up to you on what you think you’ll need, but I usually include:

  • Antacids
  • Lactose Pills
  • Aspirin – IBUProfen – Excedrin
  • Anti-Diarrhea Tablets
  • Allergy Tablets
  • Small Bandaids
  • Melatone

Make sure to pack it all in a clear case so you’ll be able to speed through security.


Photo by Jorge Rosal on Unsplash_Small

Get Charged for Entertainment:

Rechargeable Battery

Bringing one of these along is great! You won’t have to fight for an available outlet while in the terminal or at your seat and you’ll be guaranteed full electronic life for the duration of your flight.

Just make sure it and your electronics are fully charged before leaving home.

Electronic Cords

Want to be your seatmate’s new BFF? Bring a few different charging cables with you, like: USBC, iPhone & Android. They’ll be in your debt for saving them from a dying battery. It also means they’ll grumble less when you have to wake them to go use the bathroom.

Tablet with Movie, TV Shows, Music, Books, Etc

I never worried about this one until I was on a 16 hour trans-Pacific flight with the worst movie & tv selection I think I’ve ever encountered. Believe me, I was kicking myself in the arse for not taking the time to add stuff to my tablet.

If you’re worried you don’t have space, you can always move apps (or photos) onto your cloud server to make space. After your trip, take large files off and download your missing apps (or photos).

Journal or Sketchbook

This is a great way to pass the time! I always bring a small Moleskin journal with me to jot down my thoughts or collect tidbits of information. I like Moleskin journals best as they don’t get messed up easily, they’re available in tons of colors, styles and sizes.

Besides looking creative and mysterious, sketching or writing are also great ways to relieve stress and tension, which we all experience during a long-haul flight.

Blue or Black Ink Pen*

Okay, I know what you’re thinking. “Andy…unless I’m writing or sketching, what do I need a pen for?”

Well, besides being able to use it to defend yourself from a psycho-killer like Rachel McAdams does in Redeye, you’ll need it to fill out customs paperwork (if flying internationally). They’ll only accept blue or black ink.

Related: The Most Important To-Do List Before Your International Flight


Photo by Shopify Partners from Burst _Small

Long-Haul Flight Zzz’s:

Cheap Eye Mask & Ear Plugs

Do yourself a favor and get these from the Dollar Store. How often are you really going to use them? Besides, the cheaper kind are just as good and if you lose them it won’t be a huge deal.

Cheap Headphones

Same thing here – get a cheap pair. I lose so many earbuds when traveling I’ve definitely wracked up a small bill. Unless you’re wearing noise cancelling headphones or earbuds, you honestly will not notice a difference.

To save money, you can always use the headphones provided on the flight. Just make sure to e-cycle them afterwards if you don’t plan on keeping them.

Neck Pillow

Yes, they look stupid. Yes, you can sleep without one – it just might not be as comfortable. No, please do not wear one as a ‘fashion statement’ through the airport.

While these suckers look ridiculous and I’m always self-conscious when pulling it out of my bag, neck pillows can really help with getting you some shut eye on long flights.

I use a Cloudz Microbead Travel pillow – it was inexpensive and does the job fairly well. Alex, my husband, swears by the Trtl Pillow. It looks funky to me but with over 7,000 reviews all praising it, I might have to give this one a try.

Extra sweater/Jacket

Most flights will have extra airplane blankets but, let’s face it, those things can be super thin and provide minimal heat. That’s where an extra sweater comes in handy!

You can wear it, drape it over your lap or place over your feet for additional warmth. You can also roll it up and place at the base of your spine to help reset your back into a more natural alignment.

Warm/Wool Socks

Personally, I think wool socks are the best thing on the planet. I get excited each Christmas when I get a brand new pair.

In my opinion, SmartWool is a great brand to go with – I’m wearing a pair as I type this post out! SmartWool uses merino wool which is a highly sought after material as it’s moisture-wicking and warm. I don’t just use their socks for travel but also for backpacking, camping and daily wear.

If you’re like me and take your shoes off during long-haul flights, you’ll want to wear merino wool as it doesn’t hold onto smells. Your travel partner and seatmate will be very grateful!

Loose/Comfy Clothing or Pajamas

I don’t do this but some people wear pajama bottoms on overnight flights. While that looks comfortable, it’s just weird to me. I usually wear leggings or a loose pair of pants.


Photo Credit Pixabay by Pexel_Small

Fresh & So Clean:

Small Toiletries

After sleeping through a long-haul flight, the only thing I really want to do is brush my teeth. Having a small case of essential toiletries can really help you feel like a new person.

I usually carry:

  • Toothbrush & Toothpaste
  • Face lotion and/or Cleanser
  • Comb or Brush
  • Travel Size Deodorant

Hand Sanitizer & Lotion

Airplanes are basically petri-dishes and people are usually gross. I touch nothing without using hand sanitizer afterwards. I mean, who wants to get sick from germs on the plane?

The lotion will help to keep your hands from drying out from the sanitizer, as well as from the dry air in the plane. Some airlines, like Eva Air, provide small bottles of lotion in their lavatories but, just in case, you might want to bring a travel bottle of your own. Just be sure it’s unscented.

Baby Wipes

Airplane air is stale and dry making you feel dirty even if all you did was sit in your seat. No wonder the first thing everyone wants to do after getting off the plane is shower!

I usually use baby wipes for backpacking but after a few overnight flights, there’s nothing like using one or two to take a hobo bath!

Extra Underwear

Just like with the baby wipes, it’s refreshing to be clean and swap out your used underwear for a new pair. Not only do you feel more human but you never know when you’re luggage might get lost or delayed – then you have an extra pair of underwear you can switch out and/or wash them until your bag arrives or you buy some new clothing.

Chapstick

Did I mention that airplanes are dry? You’ll thank me later.


Photo by Maria Vernigora on Unsplash long-haul

Beat Away that Hangry Mood:

Non-offensive Smelling Snacks

Don’t worry, I’m not going to dictate what you eat on a flight but I do want to point out that smelly foods like bananas, blue cheese and sardines have very potent smells. When you’re stuck in an aluminum tube, for hours, that smell can get offensive very quickly.

Look for snacks that have lighter smells, like:

  • Apples
  • Grapes
  • Carrots
  • Pretzels or Chex Mix
  • Chips
  • Cookies

Energy or Granola Bars – these are my favorite

Empty Water Bottle

I bring one on every trip because I just can’t justify paying $5 for a liter of water. It’s silly! Not to mention, it’s harmful to the environment.

Plenty of airports have filtered water fountains or water filling stations so paying for a fancy bottle isn’t necessary. Just bring an empty water bottle or nalgene through security and fill it up before you board your flight. Now you won’t have to flag down the attendant for those tiny cups when you’re thirsty.

Here are several water bottles that would work:

Hard Candies/Gum

I took my first flight when I was 5 years old and remember my mom giving me a lollipop or gums to help ‘pop’ my ears.

I always thought it was the act of chewing that did it but apparently it’s swallowing. Chewing helps increase the flow of saliva which makes you swallow and helps to open the Eustachian tube which ‘pops’ your ear.

I still bring gum along on a flight, although I’ve upgrade from a lollipop to hard candies.

Caffeine & Alcohol

I survive off two things: coffee and wine. But too much of either of these things during your long-haul can be really mess with your sleep cycle and make you dehydrated.

On the other end, both are free on long-haul flights and, when balanced with water, can really make for a pleasant trip. Moderation is key though.

I’ll drink coffee to stay up until it’s a ‘suitable’ hour at my destination to sleep – this helps me to readjust to a different time zone so I’m not as jet-lagged. I’m also a anxious flyer so a small glass of wine helps me to relax and become drowsy if I need to sleep during the flight.

But I will say it again: moderation is key. And always re-hydrate with water.

Related: The Most Important To-Do List Before Your International Flight


This list isn’t set in stone. Modify it, customize it to each trip and make it your own! You can even use it for traveling by car, bus, train, boat, whatever you’ll be on.

I really hope these suggestions help you out with your next trip.

If there’s something you believe is a must for a long-haul flight, comment with your suggestion down below!


11 Comments on Long-Haul Flight Survival List

The Most Important To-Do List Before Your International Flight

I absolutely LOVE the feeling you get just after booking an international flight. You know what I mean. The excitement & anticipation, the whole I-Can’t-Believe-I’m-Doing-This feeling you get when you’ve…

I absolutely LOVE the feeling you get just after booking an international flight.

You know what I mean. The excitement & anticipation, the whole I-Can’t-Believe-I’m-Doing-This feeling you get when you’ve clicked the confirmation button.

You’ll be in a foreign land with new sights, foods, even a new culture!

But before you even begin packing there’s a TON of things you need to do.

I’m not talking about booking hotels or transportation, although those are very important. I’m talking about all the pre-boarding logistics.

Lucky for you, something else I love is lists!

So I’ve made the following for you….

international flight pinterest pin


The Most Important To-Do List Before Your International Flight


Attention: My post may contain Amazon affiliate links! As an Amazon Associate I earn from qualifying purchases.


boarding pass passport ticket travel

Check Your Passport and Visas

New or First Time Passport – US Only

A passport is the most important thing you will carry with you on any and all international flights. It is the only form of official identification that’s vaild. Not even a state issued license will help.

If you’re a US citizen applying for your first passport, you will need a notarized copy of your birth certificate (not a photocopy), a state issued license or identification card, the New Passport application, payment for the application fee and a 2”x 2” color passport photo.

Passport photos can be taken at home but it’s best to get it done by either a US Post office with passport services or by a drugstore like CVS which specializes in passport photos.

A new passport will take upwards of 4-6 weeks to process so plan accordingly.

Renewing or Correcting A Passport

You cannot fly or leave the country with an expired passport.

You might be thinking, ‘Well, duh!’ but you’d be surprised how many people forget to check their passports before a trip to confirm it’s still useable.

In the USA you need to have, at least, 6 months left on your passport before it expires. Otherwise, you might leave the country and not be let back in.

That’s pretty scary.

Renewing your passport can take up to 8 weeks so it’s best to renew once you get to the 6 month mark.

This goes for making changes to your passport as well, such as name changes.

If you’re in a hurry, or need to renew or change your passport last minute, you can expedite the process to 2-3 weeks for $60.

This happened to me after I got married. I changed my last name and waited until the last moment to get my passport changed. While I’m glad my passport got changed in time, the $60 bucks is definitely a slap on the wrist.

Lesson learned – I definitely won’t wait until the last minute again.

Related: Long-Haul Flight Survival List


international travel explore planning trip

Thoroughly Research Your Destination

Sights, Smells and Tastes

Okay, this one seems pretty obvious, I know. But for someone like me, who plans and organizes international trips like crazy, once I’m at my destination I pretty much just go with the flow. That doesn’t mean I don’t know what’s in the area.

There are some travelers who have no plan whatsoever and others who have each day planned down to the minute.

Whichever one you are, it’s always good to have an idea of what each city or country as to offer.

Here’s what I do, I make three lists:

  • Foods I’d like to try
  • Sights I’d like to see but won’t cry like a baby if I don’t
  • Absolute must-see sites

I carry this list with me everywhere I go when I’m traveling so, if I find I have some down time, I can check my list and plan from there.

Having a plan isn’t a bad thing but make sure you also have some time to go with the flow of the city or country you’re in. You’ll find that the local customs begin to rub off on you.

For example, when I went to Morocco with my husband I thought we’d be moving from one thing to another each day. After a while that was pretty exhausting.

Instead, in the early afternoon, we would choose a cafe, order a coffee and people watching. Funny thing is, it seemed like that was what most locals did as well! It’s honestly one of the more memorable things we did there and what a wonderful way to interact with people.

In Case of An Emergency

Another thing you will want to research before you head out is where your country’s consulate or embassy is. You’ll also want their phone number and/or emergency line. For US citizens, there is a comprehensive list here. 

I understand this sounds silly and old-fashion but if, for whatever reason, there’s an emergency or issue while you’re away, you will need to contact them.

An embassy and consulate are your sources for getting documents or passports in the event yours are lost or stolen.

Also, if there’s a natural disaster or unrest in the visiting country, your embassy or consulate can provide assistance or advice on how best to get to safety.


halong bay vietnam girl boats islands

Purchase Travel & International Medical Insurance

We all want to believe the unthinkable would never happen to us. Unfortunately, travel qualms and medical mishaps can happen to anyone, anytime and in any place.

Perhaps your luggage didn’t make it onto your connecting flight or you missed your flight home because or bad weather. You may have even hurt yourself while heading down some steps.

Accidents and mishaps happen, they are unavoidable. The best way to handle situations like these is to purchase some form of travel insurance.

First, check with your usual provider to see if they offer an international insurance plan you can tack onto your current plan. If they do not provide this, you’ll have to research travel insurance companies.

There a a ton of companies out there but I personally use Travel Guard and have used them for several of my trips. Their site is easy to navigate and I got a quote quickly. I also loved that I was able to make changes directly online to my policy.

While I’ve not had to utilize their services while abroad, a fellow traveler, who also had Travel Guard, did.

His bags were lost in transit and he had nothing but what he was wearing & some light toiletries in his carry on. Thankfully Travel Guard was quick in getting him insurance money to buy clothing & necessities while the airline tracked down his luggage.

Most travel insurances will also cover medical but you’ll want to read the fine print thoroughly. Some international insurers have travel and medical separately so be careful of that while shopping around for the best company.


doctor nurse medical

Complete Medical Evaluations and Vaccinations

Wait….what?

Yep, vaccinations are definitely something to add to your To-Do list before heading anywhere outside of your home country.

Even if you’re leery of getting vaccinations, and ultimately decide not to, it’s best to be educated on which diseases are an issue so you can, at minimum, take precautions.

Most countries will provide a list of their standard immunizations for travelers and, while you can discuss not getting the vacs with your doctor, some countries will not let you in without signed documentation that you’ve been properly vaccinated for certain diseases. This is common of lesser developed countries.

For example: Proof of vaccination of Yellow Fever is required for entry into countries like Mali, Ghana, Liberia and Angola.

If you decide to get the vaccinations, the CDC recommends heading to your doctor or a local travel clinic 4-6 weeks before your trip.

If you are pregnant or have a history of illnesses that have weakened your immune system you’ll definitely want to consult your physician about which vaccinations are best for you and if it’s safe for you to travel.

While almost all countries will allow visitors to travel within their borders without receiving vaccinations, you do run the risk of becoming ill on your trip. No one wants that but the decision is ultimately yours alone.

In my honest opinion, I’d rather be safe than sorry so I always get the recommended vaccinations unless my physician says otherwise.


computer pointing travel

Check International/Travel Advisory Boards

You might think this is overkill but I’ve always believe that being prepared also means being educated.

With that in mind, I usually begin checking Travel.State.Gov about 4 weeks before any trip, just so that I am aware of any potential situations that could arise while I’m at my destination.

Checking out travel advisories when you are considering taking a trip is also a good idea! Travel advisory boards provide detailed information as to the current state of countries you’re interested in visiting & could alter your travel plans.

Travel.State.Gov is my personal desktop go-to for information since it gives travel advisories, notifications, information on local embassies, and more.

There are also plenty of mobile apps out on the market, both for Android and iPhone, which are free to download as well.

I use an app called International SOS Assistance. It uses my GPS to provide up-to-date travel advisory information even if I cross a country’s border.

Remember, travel advisory boards do more than just provide information about social or political unrest. They can also provide information about transportation issues or delays, local protests, and weather delays.   

Related: How to Ease Travel Anxiety


Foreign Currency money travel international

Exchange Some Currency

Before you leave for you trip, it’s always smart to exchange some of your national currency for that of your destination.

You need a little foreign currency so that you can book transportation from the airport to your hotel.

There are plenty of places you can exchange currency: banks, currency booths, airports, etc. These places usually carry common currencies like British pounds, Canadian dollars, Chinese renminbi, Japanese yen, so on and so forth.

If you’re heading to a lesser traveled country like Mongolia or Zambia, you might need to contact the bank several weeks ahead of time so they can order those currencies for you.

Check if there is a fee for this before proceeding.

Before handing over your cash, compare the exchange rate at each place. Rates will vary depending on the institution you buy from since they usually ‘hide’ a commission or processing fee in the exchange rate.

For example: your local bank might sell you Euros at a 7% exchange rate which means if you buy $100 USD of Euros then the bank will charge you $7, or $107 USD total.

Pro-tip:  I have found that banks offer the best exchange rates & fees – definitely much better than airport exchanges.


woman plaid cell cellular phone

Research Where to Purchase SIM Card (If Necessary)

Unless you are shoveling money over for an international plan, you will have to purchase a SIM card once you arrive at your destination (or before if you can).

A SIM card is the small chip inside your cell phone that is used for data storage, like contacts and text messages, and is used to connect to a mobile network like Verizon or AT&T (where data usage comes in).

Without a SIM card, your phone simply will not make traditional calls or text.

Once you have purchased a SIM card from reputable cellular store at your destination, you will need to activate it. Request this service if they don’t immediately do it for you.

Also, be aware that when you’re using a foreign SIM card you will have a new, local phone number. You might want to inform friends and family of this so they’re aware of how to reach you and vise versa, if you need to contact them.

If you would prefer to not change your SIM card you can still use WiFi for most everything else. A lot of hotels typically offer free WiFi but you may want to contact them ahead of time to confirm.

Pre-download applications like Facebook Messenger, Google Hangouts or WhatsApp are super helpful messengers and are free.


airport terminal international travel

Purchase Travel Necessities, Accessories and Snacks

Ever get to the airport and wish you had a neck pillow or one of those soft eye mask? Or how about some snack so you don’t have to spend money on overpriced junk food?

We’ve all been there, especially me who seems to become absolutely famished the moment I pass security.

The weeks leading up to your international flight is a great time to stock up on snacks like nuts, dried fruit and hard candies which don’t have a harsh smell and are easy to travel with.

Pro-tip: Just make sure to gobble everything up before landing – some countries won’t let you bring in food or drinks.

Accessories like neck pillows, eye masks, power converters and cords are definitely must-haves for extended flights! Of course, purchasing these items from Amazon or a local shop can save you a ton of money. I’ve seen airports  jack up the prices by 10-20%! Yikes.

If you’re on a budget, look for these items at stores like Ross or Marshall’s where they’ve slashed the prices almost in half.

If you have a friend or family member who travels frequently, perhaps you can borrow their power adapter kit or packing cubes.


credit card money plastic

Inform Your Bank & Credit Card Company of Travel

Nothing is worse than traveling internationally and having your card declining. It’s certainly embarrassing, yes, but it’s also scary! Especially if you don’t have cash on you.

Most banks have fraud protection and will immediately activate those protections if they see anything out of the ordinary.

For example, if you used your card at a coffee shop in L.A. and 12 hours later buy dinner in Paris, France.

The best way to negate an issue like this is to contact your bank and let them know that you’ll be out of the country. For some banks, that info alone is fine, but for others you may need to provide dates and destinations.

Confirm with your bank as to what their international fees are if you’ll be using a debit card to pull cash from ATMs. Some will have a 2-3% fee, others will have that PLUS an additional $3-$5 service fee.

Unless your bank offers $0 international fees at all ATMs, like a Charles Schwab or Capital One account, you could be hit with $100+ USD of fees.

If you’re on a budget, like me, then something like that could really hit hard.

So, does that mean you shouldn’t use an ATM? No, you certainly can use them! Just be aware of the fee you will have to pay.

Best best practice is to pull out as much as you will need for the duration of your trip. This way you’re only charge the fee once and not each time you got the ATM.

Example: If you take out $1000 USD for a 10 day trip and the fee is 3% + $5. You’ll be expected to pay $35 in fees. If you pulled out $100 USD each day, for 10 days, your fee would be $8/day which totals $80.

$80 is much better in your pocket.

Related: Long-Haul Flight Survival List


seats passenger airplane interior

BONUS TRAVEL TIP!

So, everything is finally booked! You’ve bought everything you need! You’ve got your passport (and visa if necessary) and you’re now counting down the days until you leave.

One last thing you may want to do before international flight is make sure everything at home is taken care. While it’s not necessary by making sure your home is in order before you leave  can help to relieve anxiety and the whole “did I forget something?” 

The best way to do this is to write a list of everything you’d normal do during the week.

Items like: grabbing the mail, paying your bills, watering house plants or your garden, anything and everything that should be taken care of while you are away.

If you’re not able to take care of these items ahead of time, recruit the help of a friend or family member to do so.

This way, when you’re sitting comfortably in your seat, jetting off to a far and distant land, you can relax and know that you’re only obligation now is to have a fantastic trip.

16 Comments on The Most Important To-Do List Before Your International Flight

Easy, Zesty Salmon & Asparagus Foil Packet

I’m known for going all out when it comes to campfire cooking; pulling out all the stops! I made fancy breakfast hashes with fresh eggs popped in the middle. I’d…

I’m known for going all out when it comes to campfire cooking; pulling out all the stops!

I made fancy breakfast hashes with fresh eggs popped in the middle. I’d cook thick steaks, swimming in butter, with baked potatoes & seasonal veggies. I’d create stews that take several hours to cook while I enjoyed a glass of wine or cider.

Yes, I was that kind of a cook. Still am to a certain extent.

I used to have no problem with spending a $100 dollars or more on groceries just for a weekend trip. And my husband was always delighted to bring half our at-home-bar to create interesting and delicious cocktails for our friends.

We were an impressive duo. So much so that friends would always jokingly ask what multi-star dining experience should they expect at camp.

Then my husband and I bought a house…

Suddenly we were on a MAJOR budget and, let me tell you, that hit us pretty hard. I had to come up with a weekend meal plan that fit into our $75 a week grocery budget.

Actually, let me rephrase that: I had to come up with a WEEKLY meal plan for only $75 bucks.

It was certainly hard at first. I had to find non-brand name replacements for the brands we were loyal to and come up with recipes that used cheaper, but still fresh, ingredients. No more organic (unless REALLY on sale), no more splurges, definitely less alcohol.


big bear lake castle rock

View of Big Bear Lake from Castle Rock


Thankfully, an Aldi grocery store moved into our area so these last few months have definitely been better but our new home is 20 minutes away….without an Aldi nearby.

I could sing praises for Aldi but I’ll save that for another post.

So, when a friend invited us to Big Bear for a weekend camping trip, we jumped at the chance to go but knew we’d have to budget wisely.

Thankfully, our local Aldi was hosting a sale on salmon at $7.99/lbs which was a really good deal.

Mind you, it wasn’t the best salmon on the market, it was farm raised and previously frozen, but it was within our budget and the results were still delicious.

I checked our fridge and pantry, noticing that we had butter, basic seasonings and a million lemons. Perfect! Easy, zesty, lemony salmon!

I also wanted to add a veggie to the meal and, since asparagus was in season, a bundle from Aldi was on sale for 0.89¢. This totally rounded everything out for a cheap, easy meal. Total cost for this meal: $12.87. Couldn’t beat that!


What was even better was I could do this all in a foil packet, thus, an easy clean up. If you’ve not tried foil packet meals, you’re really missing out. I adore my Lodge cast iron skillet but the easy clean up of foil packets sometimes has got that pan beat.

So here’s my recipe for:

Easy, Zesty Salmon & Asparagus Foil Packet


Attention: My post may contain Amazon affiliate links! As an Amazon Associate I earn from qualifying purchases.


What You Need:

Ingredients:

  • 1.5 lbs Salmon*
  • 1 lb Asparagus*
  • 1 Lemon
  • Unsalted Butter*
  • Salt & Pepper

*See below for food tips & alternatives.

Serving size:  2 people


easy lemon butter salmon asparagus foil packet

Cooking Instructions:

Start the campfire and let it get hot. Make sure the grilling rack in down.

While the fire is going, begin working on the foil packets. Now you can do individual packets or one for the fish, another for the asparagus. For this recipe, I did the latter.


camp cooking foil packet lemon butter salmon

Take the salmon and sit it skin down on a sheet of foil. Salt and pepper the top.

Add several slices of butter to the top, as well. You determine the amount you prefer to use, I used several ¼” slices but I LOVE butter.

Cut the lemon into ¼ inch slices. Add several to the top of the butter. The flavors will blend together when the lemon heats up and the butter melts.


camp foil packet

Place a second sheet of fold on top, pinch the edges close so the steam cooks the fish.


fire campfire salmon lemon

Put the salmon packet on the grill rack near the fire but not directly into flames. Rotate the packet every few minutes so the salmon cooks thoroughly and evenly.

Salmon should be fully cooked after 8-10 minutes, depending on heat and thickness of the fish. Check it periodically while cooking – salmon is flaky when fully cooked.


lemon butter asparagus

While the salmon is cooking, take the asparagus out and cut off about 1”-1.5” off the bottom, discard.

Take a third sheet of foil and place the asparagus in the middle.


Add several slices of butter, salt and pepper. Pinch the packet closed and add to the grill.


lemon asparagus foil packet

Cook for approximately 6-7 minutes, depending on thickness and desire of crunch.

I like my asparagus slightly crunchy so mine only took 6 minutes.


cooking campfire foil packets

Remove both salmon and asparagus from grill.


easy salmon asparagus lemon

Divide into individual portions and serve immediately.


Foodie Tips:

Salmon – While I used cheap, farm raised, previously frozen salmon and it turned out great, you can certainly splurge here and get the really good stuff from Whole Foods, Gelson’s, or your local farmer’s market. You could even try this recipe using different fish like cod or tilapia.

Butter – I was raised by strong, VERY southern women so in my house we use real butter. While you might still get a similar taste with butter substitutes, I still recommend using real butter, unless you have an allergy. Also, go with unsalted as it’s easier to control the saltiness that way.

Asparagus – I used asparagus as it was in season and on sale but you could sub in another vegetable like green beans, carrots or squash. Just adjust the cooking time.


If you’ve tried this recipe out, leave a photo or comment down below! 🙂


3 Comments on Easy, Zesty Salmon & Asparagus Foil Packet

Type on the field below and hit Enter/Return to search

Get the Latest from Thousand Mile Boots!
Receive all the latest outdoor and travel tips & advice.
We will always respect your privacy.