Thousand Mile Boots

Exploring The World One Mile At A Time

Month: March 2018

10 Reasons Why You Need To Go Backpacking

“OMG! That looks like so much fun! I wish I could go backpacking!” It’s a statement I hear often each backpacking season as I relate to friends and family my…

“OMG! That looks like so much fun! I wish I could go backpacking!”

It’s a statement I hear often each backpacking season as I relate to friends and family my schedule of backpacking and car camping trips. They ooh and ahh over the photos, promising that they’ll clear a weekend to come with Alex and I on one of our adventures.

Alas, many of them come up with what I believe are excuses for not getting outside. Some find it’s too expensive, or they’re not in good shape or they have family obligations, the list goes on and on.

But here are 10 Reasons Why You Need to Go Backpacking!


Attention: My post may contain Amazon affiliate links! As an Amazon Associate I earn from qualifying purchases.


It’s Cheaper Than A Traditional Vacation

Backpacks - Group Shot

No, seriously, it is. Most permits will range anywhere from $20-$45 (cost varies depending on location, group size, etc). For major locations, like national parks, there’s usually an entrance fee so be sure to check out America the Beautiful Annual Pass at Recreation.gov – for $80 it gets you free entrance into national parks like Grand Canyon, Yosemite and Zion.

Pro-Tip: Most parks will allow you to book 6 months in advance, so mark your calendar & set reminders. Use the campground’s main website to scout the best site and have a backup in the event your first choice is reserved.

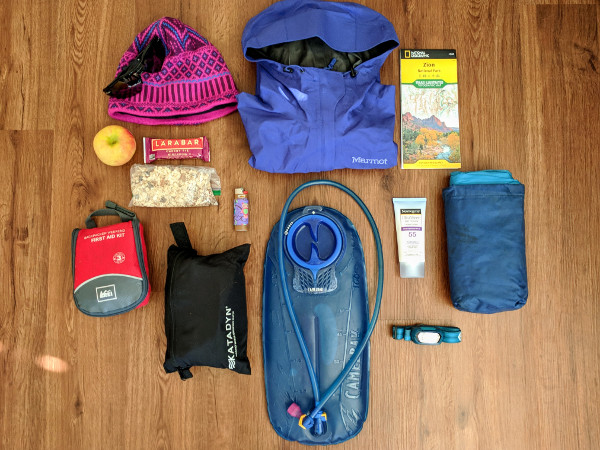
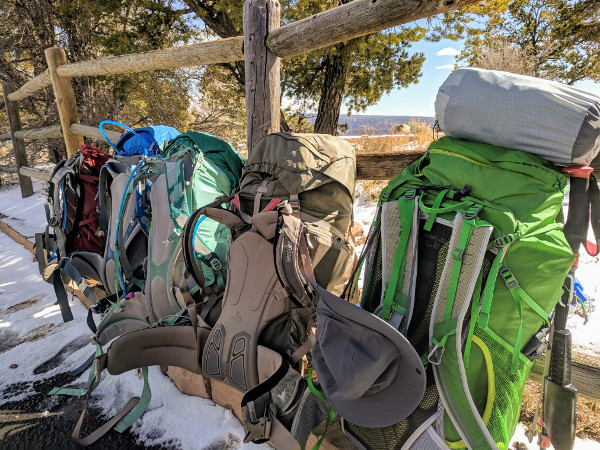
While purchasing gear can get expensive, there are tons of great places to get discounted or gently used gear. Online stores and outdoor shops routinely run promotions & sales throughout the year. Companies like REI will regularly purge their inventory by having huge garage sales where you can purchase returned or gently used items for a fraction of the regular sale price. 

Remember to take care of your gear; if you do, it can last you for years.

First time backpacking and worried you won’t like it? No worries! There are a several companies that will allow you to rent gear to try out. Just do a web search for ‘backpacking gear rental’.

Related: 10 Essentials for Hiking & Backpacking


Physical Activity = Better Health

Holding Boulders

Remember that New Year’s resolution about working out and going to the gym? You know, the one you haven’t started? Don’t feel guilty, we’ve all been there.

You don’t have to do high intensity workouts in a gym to look and feel better. Going outside for a hike or backpacking trip are great alternatives to a gym membership. Hiking typically is free and backpacking usually is inexpensive (see above).

Even if you’re not into backpacking, taking a walk or bike ride around your neighborhood is still great for your health and body. Getting in shape and saving money? That’s a win-win situation!


It’s Good For Your Mental & Emotional Health

Being outdoors in nature is as good for your health, both mentally and emotionally, as it is physically. Multiple health studies have shown that it can lower stress and increase serotonin levels. Other benefits include improved concentration, physical recovery and a decrease in episodes of depression. 

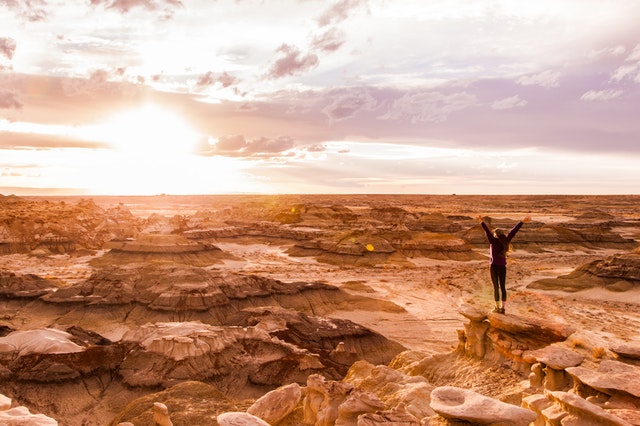
For me, it helps to refresh my spirit and remind me to slow down & enjoy life.


Forge Deeper Relationships

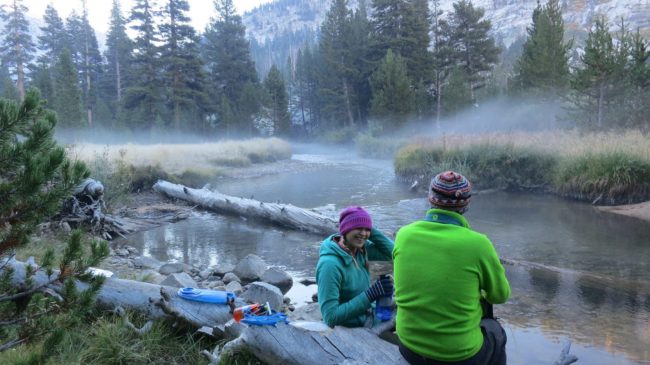
Heading out into the backcountry is a great way to connect with family and friends. I have several friends who will clear their calendars to come out on a backpacking trip and it’s always a pleasure to catch up with them while we navigate trails.

Another great reason to backpack with a companion? You can split gear between two people making your pack a little bit lighter, maybe even cheaper. Big plus!

Thinking about trying solo backpacking? Don’t fret! Backpacking solo allows you to gain a deeper understanding of yourself and allow you time for reflection. It’s also a great way to meet other explorers and create new friendships. Just make sure you are properly prepared and have a good understanding of what solo backpacking entails.


Enjoy Public Lands

“We have fallen heirs to the most glorious heritage a people ever received, and each one must do his part if we wish to show that the nation is worthy of its good fortune.” – Theodore Roosevelt

President Roosevelt, with Congress, worked to create national parks across the country claiming that these places should remain unmarred by man.

Yes, if you go far enough back you can see the unsightly history of how the United States has claimed these lands but, despite its history, public land is open for everyone to visit, no matter where they come from.

Take advantage of seeing these incredible places before they’re no longer there.


See Sights You Can’t Drive To

Swap - Yosemite Valley From Nevada Falls


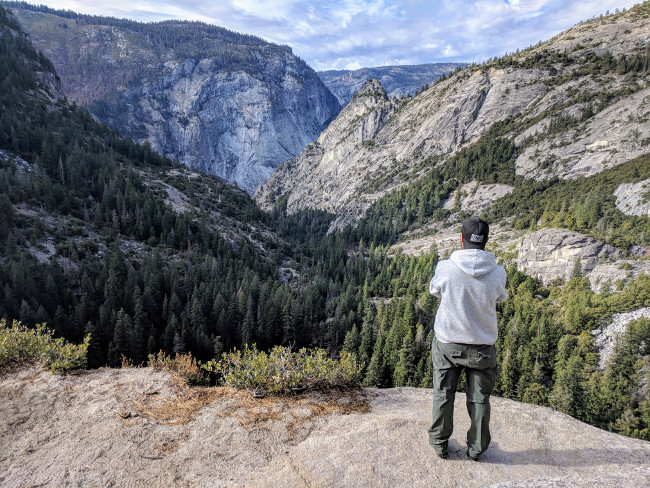
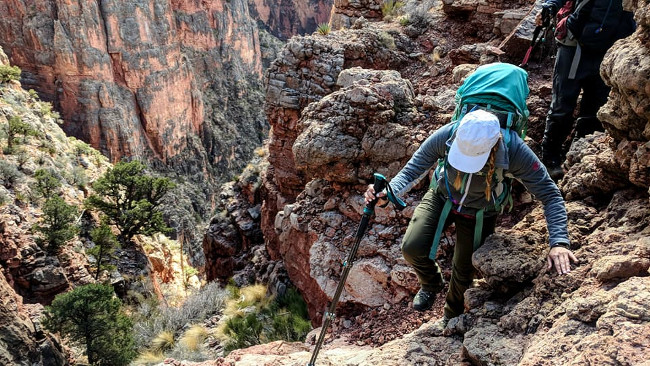
Anyone can drive to a place like the Grand Canyon, park at a vista point and take a selfie but have you been down to the river and looked up? Let me tell you, the experience is breathtaking. Ever been on the peak of a mountain in the Sierra Mountains? You feel so big and so small, all at the same time.

Backpacking, hiking in general, allows you to see magnificent sights in a way you’ve never seen before. Sights that you cannot just drive up to.

Bottom line: If you really want that Instagram worthy photo you’re going to have to work for it.


Unplug From Technology

I won’t lie, removing yourself from technology, even for a few days, can be difficult. We’re so used to having information at the tip of our fingers it’s hard to imagine going several days without tech. But trust me, connecting with nature rather than social media will really help to recharge your spirit.

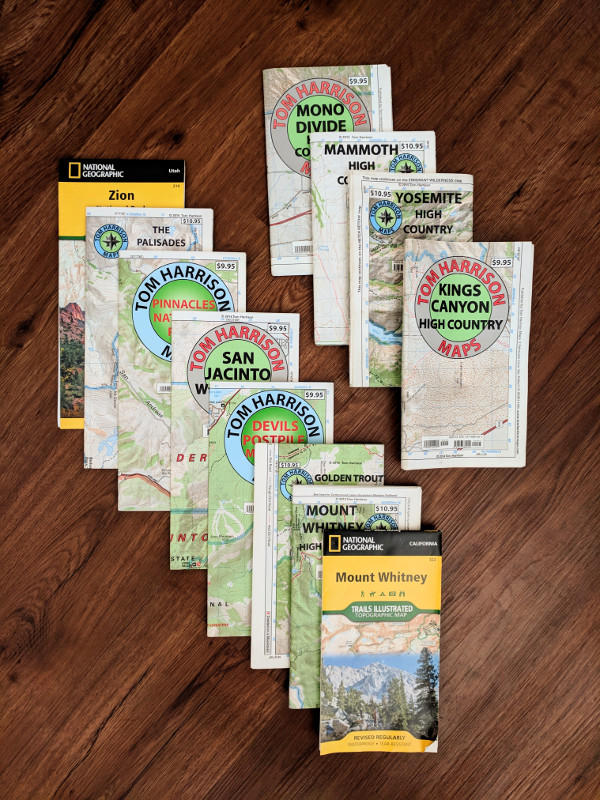
Don’t get me wrong, you can still carry it with you but your phone has more uses than just emails and social media. You can use it in the backcountry as your camera and as your GPS map or for topo maps.


New Found Appreciation

Photo by Pete Johnson from Pexels

I love this one since it really impacts the way you view what you have. After several days and nights backpacking, it’s incredible how much you appreciate simple things like a soft bed, the AC in your car or your shower.

These are items we take for granted and while backpacking is definitely not easy, it really helps to open your eyes to just how lucky we all are.


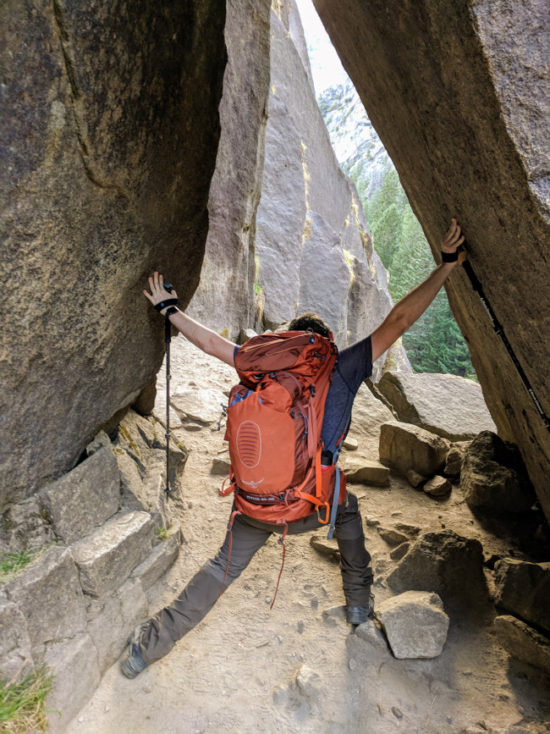
Prove To Yourself You Can Do It

I’ll let you in on a secret: I’m always nervous when I hit the trailhead. “Can I really do this?” is what I always think when I’m throwing on my pack.

Yes, some of the trip will be rough. You’ll be sore, tired and you may begin to doubt yourself. Just remind yourself all of these feelings will be overshadowed by how much you accomplish and how you overcame these negative feelings.

After I completed the Rae Lakes Loop in the Sierra Mountains, a long 5 day/50+ mile trip, I cried with happiness because I had overcome the doubt and pushed myself harder than ever. I set a lofty goal and met it with fierce strength and determination.


Basically, You’ll Look Like A Badass

Because You're A Badass

Because who doesn’t want to be a badass? 🙂

Related: 10 Essentials for Hiking & Backpacking

Do you like to go backpacking? What are your reasons for getting out into the backcountry?


3 Comments on 10 Reasons Why You Need To Go Backpacking

10 Essentials For Hiking & Backpacking

If you’re a seasoned backpacker, or even long distance hiker, you already know about the 10 Essentials; a list of the essential items each outdoorsman should always carry. It was…

If you’re a seasoned backpacker, or even long distance hiker, you already know about the 10 Essentials; a list of the essential items each outdoorsman should always carry. It was created by The Mountaineers  in the 1970’s and then modified for new tech in 2003.

While it’s become second nature for outdoor enthusiasts to carry these items, for newcomers it’s a new concept and once you’ve seen the list your first thoughts might gravitate towards: How am I supposed to carry all that?!

Related: 10 Reasons Why You Need to Go Backpacking


Attention: My post may contain Amazon affiliate links! As an Amazon Associate I earn from qualifying purchases.


Whether you’re going out for a few hours or a few days, you should always bring these items. as your safety might highly depend on them.

Here’s the list:

  1. Water
  2. Food
  3. Navigation
  4. First Aid
  5. Insulation
  6. Sun Protection
  7. Light
  8. Fire Starter
  9. Repair Kit
  10. Emergency Shelter

Now let’s break this down into detailed blocks:


Water

Generally speaking, you can survive approximately 3 days without water but it’s not pleasant. This is why water is a must, no matter the length of your trek or the weather/trail conditions.

Most day hikers carry a 1 liter nalgene. For backpackers, taking along a water filter is a must, as well as, a minimum of 3 liters of water. Personally, whether it’s backpacking or a day hike I always carry a 3 liter bladder.

I like to carry the Katadyn Hiker Pro Water Mircofilter as it’s lightweight, fast (can fill a 1 liter bottle in a minute) and does an excellent job of removing most harmful viruses, bacteria and particulates.

Iodine tablets are useful as a backup and will kill most viruses and bacteria, however, it won’t kill certain parasites like Cryptosporidium. Iodine tablets are light to carry, work in about 20-30 minutes, but have a slightly metallic taste. Still, it’s good to have it with you as a backup.


Food

Have you ever been ‘hangry’ out on the trail? I sure have and my husband tells me it’s not a pretty sight…

This is something you customize for each trek, depending on whether you’re taking snacks for a day hike, or full meals for a backpacking trip. My suggestion, try looking for high protein, high calorie items like nuts, jerky, trail mixes and bars. You can easily make your own granola bars & trail mixes at home.

If you have a dehydrator, try making homemade fruit leathers or my Spot On Jerky!


Navigation

Topo Maps

Best thing to do if you get lost: keep calm. Nowadays most phones have GPS and you can download hundreds of trails apps like AllTrails (Free) and BackCountry Navigator ($11.99). We use BackCountry Navigator on an old smartphone and it’s been superb!

A paper map of your trail and the surrounding area is also super helpful in case your GPS or phone loses battery.

In addition to having a map and GPS/trail app, check in with the Ranger Station if you can on your way in and way out. Some parks will require this, so check ahead of your arrival.


First-Aid

First Aid Kit

Let’s be real here: when you’re out in the wildness with friends someone is bound to get hurt or, at least, a gnarly blister (See REI’s cure for blisters).

There are tons of first aid kits out there, as well as some really awesome articles/videos on making your own kit. For example, my friend LeeAnn, who joined our Grand Canyon trip, had a clear nalgene full of first aid items to cut back on weight. Super clever!

While you won’t need to carry a whole pharmacy you should have the basics : band aids, ointments, tweezers, pain killers and moleskin. Some store bought first aid kits will have more than others but once you have the basics you can add necessary items as you go.

I’ve been using the REI’s Backpacker Weekend First-Aid – Unfortunately they no longer make this one but the HART Health Weekend First-aid kit is pretty much the same thing. It has all the basics for any injury, it’s affordable, and folds easily into a zipper pouch. The fact that it’s red makes it easier to find in your pack.

Pro-tip: I inspect it before heading out and resupply it after each trip, if necessary. 


Insulation

You started your trek out with sunshine and high temps; better yet, you’ve made it to the peak just in time for a spectacular sunset! But when that sun sets and the temperature drops, or the weather takes a turn for the worse, you’ll be struggling to keep warm & dry, especially in the cooler seasons and/or at higher elevations.

Layering your clothing is highly recommended as you can put on or take off whatever you need to take keep your body at a comfortable temperature. Keep in mind the weather you’re heading out into and make sure pack accordingly.

For example: a full day hike in the high Sierra Mountains, early-summer:

Base Layer: sports bra and/or quick drying underwear, sock liners, socks (I personally use Darn Tough)

Mid Layer: hiking pants/shorts, moisture-wicking t-shirt or long sleeve shirt

Top Layer: fleece jacket and/or windbreaker, or lightweight down jacket

These are just the basics which you can build off but, again, your clothing choices will really depend on the weather and your comfort level.


Sun Protection

As much as I hate putting it on, sunscreen is the best protection around even for those who swear they don’t burn. UVA and UVB are the largest contributing factors when it comes to skin cancer which, on average, effects over 3 million people each year.

Doctors recommend using sunscreen with an SPF rating of 15+ but because I’m pale I use a sports version sunscreen that has SPF 50. Overkill? Perhaps. Sunburns have landed me in the hospital before so I’m glad for the additional SPF protection.

Hats and sunglasses are another big things for sun protection. You can wear anything from a baseball hat to outdoor sun hats but in warmer climates you may want something with ventilation.

In the winter time I use a wool hat with either a fleece or micro-chamois liner that allows moisture to escape through the fibers while still retaining heat. Keep in mind, your head and feet are the major areas for heat so keep them cool in the summer and warm/dry in the winter.

For me, sunglasses are a must! Constantly squinting can force the muscles in your temples to work overtime leading to wrinkles and migraines. While I personally love Oakley for my sunglasses you can honestly use any brand.


Light

Headlamps

The sun is setting and you still haven’t reached your destination. Looks like you’re going to have to hike in the dark. And while most phones have a “flashlight” mode it’s annoying to have to carry it while trying navigate the trail. That’s where a small, reliable headlamp comes in handy because it’s, well, on your head rather than in your hand.

Look for one that has several modes including a dimmer for white light, a red light mode to help keep your night vision and a flash mode that can be used to signal help.

Honestly, I use mine for more than just backpacking since it’s super versatile. Just make sure to carry spare batteries in case you’re running low.


Fire Starter

Some backcountry areas allow a campfire (always check with the ranger station as to their current fire rating/condition). Alex and I will each carry our own lighters and kindling can be made from dried sticks, moss and more.

When building a fire, whether it’s for warmth, cooking, nostalgia,whatever it is, be sure there is a good 20′ clearance around you and that it’s free of leaves & debris. Create a pit with large rocks surrounding it and keep the fire small. No need to create a bonfire.

When you’re ready to leave (or turn in for the night) make sure your fire is completely out using, at least, 1 liter of water to cover the coals. Stir with a stick and hold your hand 6″-12″ above the coals, checking hot spots. If at that height it’s still warm, douse with more water. 

Having waterproof matches or a magnesium fire starter are a great back up in stormy weather.


Repair Kit

While I do agree with this being on the 10 Essentials list I rarely carry a full repair kit.

Instead, I’m a believer in duct tape! I leave a roll in the house, in my truck, wrapped around my nalgene bottle and my lighter – honestly all over the place. It’s a cheap alternative to a full repair kit. You can use duct tape to patch a hole in your tent, apply to your heels for blister protection and tap down your shoes if the soles are coming off.

I honestly just love the stuff.


Emergency shelter

It’s smart to carry a tarp as you can hang, rig or fly it over your tent in the event of rain or snow, as well as provide additional shelter if something happens to your tent. Tarps are fairly light and can pack down pretty small. 

I have the Sea to Summit Escapist Tarp and so far it’s been pretty good but a tarp from your local hardware store would work too.

An alternative would be to use natural materials like branches, logs and stones but…I’m lazy and use a tarp instead.

Related: 10 Reasons Why You Need to Go Backpacking

Sounds like a lot, I know.

Try splitting some of this up between two people so it’s easier to carry. You can also find a clever solution where you can use two items together, like my using duct tape around my nalgene bottle.

So there you have it. The 10 Essentials.

Full 10 Essentials

It’s best to be ready for any situation!


No Comments on 10 Essentials For Hiking & Backpacking

How To Poop in the Woods

So you’re in the backcountry. It’s been hours since you’ve seen another soul and you stop to take in the glorious sight around you. That’s also when that all-too-familiar feeling…

So you’re in the backcountry. It’s been hours since you’ve seen another soul and you stop to take in the glorious sight around you. That’s also when that all-too-familiar feeling strikes: the call of nature.

You knew you’d eventually have to relieve yourself in the wilderness but how? What’s the best way? And do you really have to ‘pack-it-out’???

Whenever I ask a friend if they want to try backpacking their first response usually goes, “Don’t I have to poop out in the woods? No, thanks.”

Overtime I’ve learned that a lot of people are afraid to go to the bathroom outside. It’s a rational, if silly, concern that even most animals have, so we’re not alone in this. Yes we are still animals, however intelligent we may or may not appear to be.

Keep in mind, relieving yourself in the wild isn’t the same as public defecation. You can’t just pop a squat in the middle of a popular trail, do your thing and be on your merry way!

There are rules you need to follow.


Attention: My post may contain Amazon affiliate links! As an Amazon Associate I earn from qualifying purchases.


DISCLAIMER: I am not a doctor and these tips are based on my experience and opinions. If you have gastrointestinal issues you may want to consult with your physician before your trip.


Get Over the Fear and Embarrassment

Peeing is less of a touchy subject (maybe because we all have wet the bed at some point in our childhoods) but pooping seems to be taboo. I’ll let you in on a little known secret: EVERYONE POOPS! You’re parents, your teachers, the butcher at the market, that model on television, everyone. And no, no one’s poop smells like roses.


Research the Regulations for the Area

You will want to review the regulations regarding human waste as these vary from national to state park, geographical area and time of year. Always do your homework with regards to all rules! Many parks will allow you to create a cathole (more on that later) and use biodegradable toilet paper to conduct your business but some parks require the Pack-It-Out method.

What the heck does that mean?

Exactly as it sounds. Everything that you take into the park must be brought back out, poop included.

Popular places that require you to pack-it-out include: Mount Whitney, Mount Rainier and Mount Denali.


RULE: Packing-It-Out

gary-chan

Now before you freak out, remember this is for the safety of the environment and the wildlife in the area, especially animals who are not used to human contact.

If you have a dog or cat at home, you might already be used to picking up poop, for human beings it’s the same concept. You go, you pick it up, you dispose of it when you find an acceptable trash receptacle.

If you’re in a pack-it-out area there are backpacker-approved items like WAG bags or Restop Bags that will help. Both bags have a magical substance inside that turns your poop or pee into a gel that’s easier to carry and doesn’t smell.

Pro-Tip: If you’re looking for a more wallet-friendly method, you can always carry a few coffee bags with you….just don’t leave coffee in them. Coffee acts like a natural smell suppressant so you won’t have the the stench hanging around while you’re trekking. I’ve used this method and it work pretty well. I’m also an avid coffee drinker so this is a good use of the bags. Just make sure to add cotton or toilet paper at the bottom to soak up urine.

Keep in mind that you will also need to place your pack-it-out bag with all your other smelly items when hunkering down for the night. Nothing with a smell, good or bad, should be in your bag or tent when turning in for the night.

RULE: Dig a Cathole

dig cathole

Many parks and smaller trails are satisfied with backpackers using catholes which is a 6” deep hole you use to bury your waste, be it pee, poop or gray water. These holes are to be made at least 200 yards from any water source.

  • To make a cathole you will need a digging tool like a compact, mini shovel. Even a large rock or stick will work in a pinch.
  • Find an area that provides coverage or privacy; gauge your level of comfort before eliminating.
  • Dig a hole approximately 6” deep (about the length of your hand from tip to wrist).
  • Squat over the hole and proceed to do your business.
  • It’s best practice to cover the cathole so that it remains inconspicuous to animals.
  • For human courtesy, place a rock over-top of your cat hole; this is an indicator to others to that a cathole is there and will deter animals from digging it up.
  • Pack out your toilet paper, if applicable.

RULE: 200 Yards?

toilet paper

Le sigh. Why must you travel another 200 yards to go pee? Believe me, for good reason.

This allows you privacy but the main reason for traveling 200 yards away is so that your feces doesn’t end up flowing into a river and polluting the water. I also believe it to be common courtesy as you wouldn’t want to poop in the river that your friend downstream is filtering water from.

That being said, there are rare occasions where park rangers encourage you to use the river for peeing purposes only. One park that comes to mind is the Grand Canyon, where the Colorado River moves very rapidly and will dilute urine so it’s no longer harmful to the environment. Still, the 200 yards applies, this time downriver from your camp.

Pro-tip: Make sure to always know which direction you came from so you can return to your camp and/or hiking companions. Not being able to find your way back sucks.


So, Do I Just Squat?

There are several positions that can provide a comfortable bowel movement, though it’s not an exact science and there’s hardly a ‘wrong’ way to do it.

Here are the best positions I’ve tried in the backcountry:

leaning against tree

The Itchy Bear

  • I don’t typically use this position but some people find it comfortable since you’re mimicking the stance you take when on a traditional toilet.
  • You will want to find a stable tree and dig a hole about 6 inches from the base.
  • Squat into a sitting position and gently lean your back against the tree. This is where Itchy Bear comes from.
  • Do your business and cover the hole up.

This position requires some leg strength as you’re essentially holding a wall squat but as it closely resembles the seated position, it’s a little less intimidating.


hanging over tree

The Overhang

I personally don’t like this position as you need to find just the right tree and it can be difficult in places like Joshua Tree or Mojave where trees are few and far between. Although you could use a large boulder….

  • If applicable, find a fallen tree, preferably one that isn’t massive.
  • Dig your cathole on on side of the tree, relatively close to the edge of the wood’s curve.
  • Still on the fallen tree and scoot yourself back until your butt hangs over the curve.
  • Do your business and cover the hole.

Again, I don’t personally like this one but I also have this fear that I won’t hang over far enough and my poop will get stuck on the side of the tree. Plus this position isn’t conducive to peeing so…


squat

The Frog Squat (or Child Squat)

This is the position many healthcare professionals believe is most natural for our bodies.

  • Find a spot that is leveled and offers some privacy, dig your cat hole.
  • Space your feet hips width or more apart.
  • Squat down so your butt almost touches the ground, release all your weight so your elbows land on your knees and your stomach rests on your thighs.
  • Do your business and cover the hole.

This position doesn’t require a lot of leg strength but may not be the best for those who have knee issues. For those who have knee issues, I would suggest using Itchy Bear or The Overhang.


cover cathole


Whatever position you choose, just remember to follow the rules of the park, be 200 yards away & downstream from camp and find the spot that, ultimately, you feel comfortable going ‘bathroom’ in. Your bladder and bowels are not to be mess with. So handle your business in the best, most educated way possible so you can get back to your kick ass trek.


No Comments on How To Poop in the Woods

Spot On Beef Jerky

I love dry fruit. I love chewy fruit leathers. I love beef jerky. All of these are a must-have when I’m out on the trail. So I had the bright idea…

I love dry fruit. I love chewy fruit leathers. I love beef jerky. All of these are a must-have when I’m out on the trail. So I had the bright idea that, instead of spending money on just small amounts of these delicious snacks, I could make my own versions for much cheaper!


Attention: My post may contain Amazon affiliate links! As an Amazon Associate I earn from qualifying purchases.


After spending hours online reading reviews, looking through forums to find the perfect dehydrator, lo’ & behold I found the Excalibur 9-tray  dehydrator. It had everything! 15 square foot drying capacity, a 48 hour self-operating timer, a clear door for your viewing pleasure, everything a novice dehydrating pioneer could want!

“But Andy,” you may ask, “why do you need large, 9-tray dehydrator with all the bells and whistles? Isn’t that a bit of an overkill?” Yeah, that’s what my husband asked too.

But this thing is the king of all dehydrators!

I justified the purchase by pointing out all the not-so-good-for-you stuff in our backpacking food, including unnecessary salts, sugars and, the most evil ingredient of all, gluten. I’m gluten-intolerant.

I’ve been gluten free since 2015 but going GF was born out of necessity, not choice. I absolutely ADORED wheat in all forms: pasta, bread, muffins, cakes, you name it.

Why did I got GF? I have a gastrointestinal issue called Irritable Bowel Syndrome (IBS) that can be caused by a build-up of bad bacteria in your intestines or by your brain and gut not communicating. Unfortunately for me that means I need to stay away from gluten. Some people aren’t affected by gluten (lucky them) but when I get gluten-bombed I basically end up on the bathroom floor in the fetal positions…for hours. Yeah, not fun.

Hence, my new Excalibur!

With a dehydrator you can create your own recipes for backpacking meals and snacks without all the not-so-good-for-you junk. It’s also perfect for people who want to get creative with their meals or have allergies like, milk, gluten or nut.

I was thrilled to try dehydrating all my favorite food but I definitely wanted to start with a must-have trail item: Jerky.

There are tons of different jerkies out there like beef, turkey, salmon, to delicious flavors like sweet teriyaki or hot chipotle. Since I had never made jerky before I decided to check Pinterest to see what was popular. Pinterest didn’t disappoint – there were thousands of recipes. Yikes!

I skimmed a few, got the general idea, and just started gathering items from the fridge, basically using ingredients I already had at home. FYI, this is a great way to use up the condiments just sitting around in your fridge.

Another great thing about jerky? You put everything into a gallon size freezer bag which makes for a ridiculously easy clean up!

So, here is my gluten free jerky recipe which, according to my husband, was honestly Spot On!

Related: Easy Dehydrated Pineapple


SPOT-ON BEEF JERKY

Tools:

Ingredients:

Counter-clockwise: Flank Steak, Sriracha, Gluten-free Soy Sauce, Worcestershire Sauce, Pepper and Brown Sugar

Instructions:

Cut as much fat off the beef as you can or purchase a very lean cut.

Place the beef into the freezer bag and store in the freezer for 1 to 1.5 hours max to harden – trust me, this will make it much easier to cut even slices.

Once the meat is a little stiff, use a very sharp knife to create ¼ inch thick pieces. Don’t worry about how long the strips are, as long as the thickness is uniformed they’ll dry evenly.

Freeze meat for 1 hour prior to cutting, this will help ensure even slices.

Combine all ingredients into a gallon freezer bag, making sure to have the meat completely covered. Go ahead and give it a little massage. 🙂

Put the meat into the freezer bag.


Add the wet and dry ingredients into the freezer bag.


Give the bag a little massage so the marinade gets into the meat.


Chill in the refrigerator a minimum of 3 hours or up to 24 hours.

After the meat is done marinating, take out the freezer bag and gently place each piece on a dehydrator tray covered with an non-stick sheet. Don’t overcrowd the sheets – you want to get even drying. 

Lay out the meat on your dehydrating mats about 1″ apart. Don’t over crowd.

Place in the dehydrator, making sure the door is securely closed so no dry air escapes.

Doesn’t that look delicious!

Set the temperature at 155° F for 5-6 hours (depending on the humidity in your area) or until the meat is completely dry.

It should ‘crack’ when you bend it. If it doesn’t, it needs more time.


Voila! The final product of your hard work!

The final product!


Store in an air-tight container. The jerky should last 1 month.

Related: Easy Dehydrated Pineapple

Have you tried this out? Feel free to leave a comment down below!

No Comments on Spot On Beef Jerky

Thousand Mile Boots – The Beginning

  Lets go back to the beginning… Five miles in and I was definitely ready to quit – either that or cry. The task seemed entirely impossible. “Why do people…

alex andy backpacking 2014

Being out in the wilderness can bring you closer to others than if you lived in a city your whole life.


Lets go back to the beginning…

Five miles in and I was definitely ready to quit – either that or cry. The task seemed entirely impossible. “Why do people do this? And for fun?” I thought while trying to ignore the hot blisters on my feet and the 45 pound bag strapped to my back. I was never an outdoor girl, much less a backpacking one. That is until I met my now-husband Alex and found myself 5 miles into a 20 mile, 3 day backpacking trip. Over Valentine’s Day weekend no less!


My introduction to outdoors came when I was a precocious teenager and my father brought home a large tent. At that time all I wanted to do daydream about boys and go shopping with my friends but, somehow, he convinced me to try camping in the backyard so that night we pitched the tent and rolled out the sleeping bags.


The night was cold, the ground was hard and I definitely had too much hot chocolate before bed. I left him in the tent for the comfort and warmth of my bed and that was the last of it.


So, how exactly did I get myself in over my head? I blame Alex.


“Have you ever been backpacking? Want to go next weekend with friends?” he asked me one night. I knew he loved backpacking and we’d been on a few short hikes, so how hard could backpacking be? “Sure! I’d love to go.”  And thus started multiple trips to REI, hundreds of dollars spent on gear and plenty of hours spent online searching for the best beginner tips so I wouldn’t be a complete fool.

andy trailhead backpacking 2014

Pine Ridge Trail, Big Sur, CA. Feb 2014.


Finally, the weekend had arrived. We’d driven the 2 hours south from San Francisco to the trailhead in Big Sur. We were going to take the Pine Ridge trail in 10 miles to the campsite, walk about another 2 miles to some hot springs the next day, and back the day after. All in all, the trip was about 22 miles round trip. Seemed doable! Man, oh man, did I learn a lot of lessons on that trip.


Mistake number 1: I had purchased my hiking boots the night before and about 3 miles in my heels were hot. By 5 miles, I knew I had blisters. 10 miles in and you get the ugly picture.


Unfortunately I hadn’t the foresight to buy my boots early and wear them on a couple hike to break them in. I probably could have worn a second pair of socks or sock liners. Even wrapping my heels with moleskin and ductape would have helped! Yes, ductape is my go-to for a lot of things, including hot heels.


Mistake number 2: We had brought way too much food and clothing so that our packs weight about 45 pounds each! All together Alex and I had about 20 pounds of food and approximately 10 pounds of clothing. Not to mention we had borrowed a 10 pound tent.


While it’s certainly better to be over-prepared, there is such a thing as “over-packing”.


Mistake number 3: I wasn’t totally certain how to go number 1 and number 2 in the woods. Yep. Learned that one the hard, messy way.


After mistake number three I was about ready to give up. I was in pain, horribly embarrassed and more tired than I had ever felt before.


andy backpacking 2014

Sometimes, you gotta get down and dirty on the trail.

Perhaps backpacking, as much as I was hoping, wasn’t my ‘thing’. Perhaps it was a hobby that Alex would have to do on his own or with like-minded individuals. Individuals who knew how to go number one and number two in the woods.


Since I was already invest in the trip (remember those hundreds of dollars spent at REI?) I figured I would finish the weekend out and break the sad news to Alex when we got home.


I was extremely thankful to have Alex with me. He was patient, letting me curse like a sailor and get angry, both at him and myself. He allowed me make minor mistakes and taught me how to prevent making more in the future. Alex was definitely the stronger of us both but, as he constantly reminded me that day, I would learn and get better. I was doubtful of that but appreciated the sentiment all the same.


After a torturous 10 miles we final made camp and that was when I got a good full look at my surroundings. It was magical. I had spent so much of the first 10 miles with my head down, trudging along, trying to keep from tripping that I never thought to look up. To take in all that surrounded me.


The tall redwoods towered over us sending off an earthy musk and making me feel tiny in comparison. The stream next to our site was clear and fresh – I couldn’t believe how water could taste so good. And the quite! The only prevalent sounds were birds, falling leaves and the bubbling stream. Nature, pure nature. Simple sounds you forget when you’ve lived in the city for so long.


It made me appreciate nature more, even if all I was experiencing was this little plot next other tired and sweaty backpackers. In my mind, I had reached paradise.


Once camp was set up, we took inventory of our sore muscles and figured, without packs, the 2 mile round trip trek to the spring would be well worth it. If you could get past the sulfuric stench and just let the hot water ease your body back into something resembling a person, it was definitely worth it.


Afterwards, back at camp, Alex, being the brilliant man he is, suggested trekking the 10 miles back over two days. I was grateful.

alex andy backpacking 2014

Break time on the Pine Ridge Trail…I needed it.


Heading back out, over two days, was certainly easier. I spent less time screaming in my brain and more time enjoying the passing scenery. Alex would stop every so often to show me this edible plant, or that blooming flower, or teach me a more efficient way of shouldering my pack so I didn’t struggle under the weight.


All too soon, we were back at the car and unloading our still silly heavy packs into the trunk. I sunk into the hot seat dead tired but proud of myself. I had made it through my first backpacking trip…smiling! Sure, it started off rough but I was still smiling at the end of it all.


A few months later and we were back out on another backpacking trip.


No longer was I embarrassment over making mistakes as I started to learn more about the trails and what backpacking entailed. The pain I once complained about, though still felt, was replaced with childish excitement. The physical and mental exhaustion was replaced with a fierce determination to prove to myself that I could conquer anything.


Each trail would have its own set of challenges and I had no doubt there would be some crying and struggling but I knew I would meet it head on…with ductape and a lighter pack of course. 🙂


No Comments on Thousand Mile Boots – The Beginning

Type on the field below and hit Enter/Return to search

Get the Latest from Thousand Mile Boots!
Receive all the latest outdoor and travel tips & advice.
We will always respect your privacy.