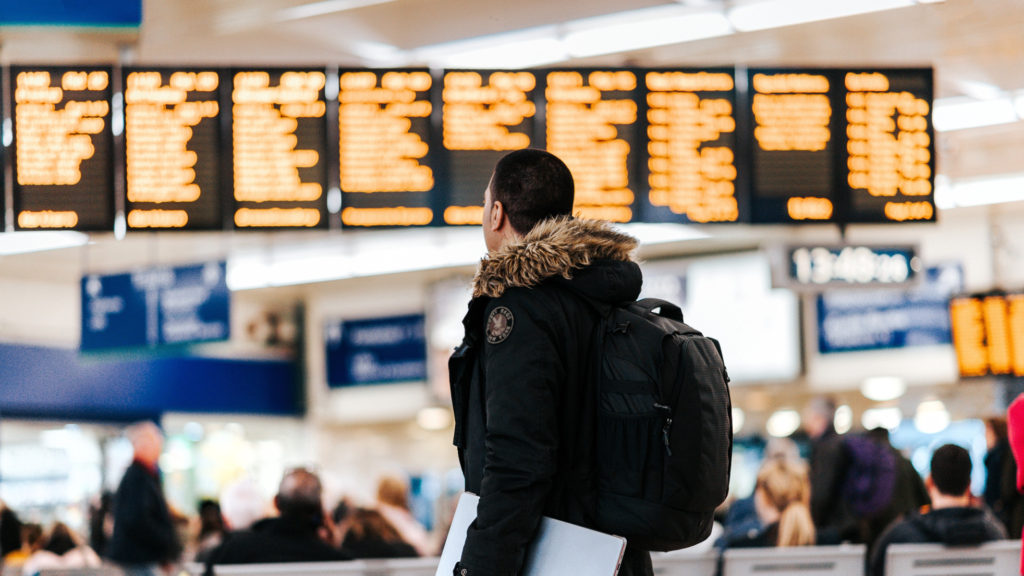
I absolutely LOVE the feeling you get just after booking an international flight.
You know what I mean. The excitement & anticipation, the whole I-Can’t-Believe-I’m-Doing-This feeling you get when you’ve clicked the confirmation button.
You’ll be in a foreign land with new sights, foods, even a new culture!
But before you even begin packing there’s a TON of things you need to do.
I’m not talking about booking hotels or transportation, although those are very important. I’m talking about all the pre-boarding logistics.
Lucky for you, something else I love is lists!
So I’ve made the following for you….
The Most Important To-Do List Before Your International Flight
Attention: My post may contain Amazon affiliate links! As an Amazon Associate I earn from qualifying purchases.

Check Your Passport and Visas
New or First Time Passport – US Only
A passport is the most important thing you will carry with you on any and all international flights. It is the only form of official identification that’s vaild. Not even a state issued license will help.
If you’re a US citizen applying for your first passport, you will need a notarized copy of your birth certificate (not a photocopy), a state issued license or identification card, the New Passport application, payment for the application fee and a 2”x 2” color passport photo.
Passport photos can be taken at home but it’s best to get it done by either a US Post office with passport services or by a drugstore like CVS which specializes in passport photos.
A new passport will take upwards of 4-6 weeks to process so plan accordingly.
Renewing or Correcting A Passport
You cannot fly or leave the country with an expired passport.
You might be thinking, ‘Well, duh!’ but you’d be surprised how many people forget to check their passports before a trip to confirm it’s still useable.
In the USA you need to have, at least, 6 months left on your passport before it expires. Otherwise, you might leave the country and not be let back in.
That’s pretty scary.
Renewing your passport can take up to 8 weeks so it’s best to renew once you get to the 6 month mark.
This goes for making changes to your passport as well, such as name changes.
If you’re in a hurry, or need to renew or change your passport last minute, you can expedite the process to 2-3 weeks for $60.
This happened to me after I got married. I changed my last name and waited until the last moment to get my passport changed. While I’m glad my passport got changed in time, the $60 bucks is definitely a slap on the wrist.
Lesson learned – I definitely won’t wait until the last minute again.
Related: Long-Haul Flight Survival List
![]()
Thoroughly Research Your Destination
Sights, Smells and Tastes
Okay, this one seems pretty obvious, I know. But for someone like me, who plans and organizes international trips like crazy, once I’m at my destination I pretty much just go with the flow. That doesn’t mean I don’t know what’s in the area.
There are some travelers who have no plan whatsoever and others who have each day planned down to the minute.
Whichever one you are, it’s always good to have an idea of what each city or country as to offer.
Here’s what I do, I make three lists:
- Foods I’d like to try
- Sights I’d like to see but won’t cry like a baby if I don’t
- Absolute must-see sites
I carry this list with me everywhere I go when I’m traveling so, if I find I have some down time, I can check my list and plan from there.
Having a plan isn’t a bad thing but make sure you also have some time to go with the flow of the city or country you’re in. You’ll find that the local customs begin to rub off on you.
For example, when I went to Morocco with my husband I thought we’d be moving from one thing to another each day. After a while that was pretty exhausting.
Instead, in the early afternoon, we would choose a cafe, order a coffee and people watching. Funny thing is, it seemed like that was what most locals did as well! It’s honestly one of the more memorable things we did there and what a wonderful way to interact with people.
In Case of An Emergency
Another thing you will want to research before you head out is where your country’s consulate or embassy is. You’ll also want their phone number and/or emergency line. For US citizens, there is a comprehensive list here.
I understand this sounds silly and old-fashion but if, for whatever reason, there’s an emergency or issue while you’re away, you will need to contact them.
An embassy and consulate are your sources for getting documents or passports in the event yours are lost or stolen.
Also, if there’s a natural disaster or unrest in the visiting country, your embassy or consulate can provide assistance or advice on how best to get to safety.
Purchase Travel & International Medical Insurance
We all want to believe the unthinkable would never happen to us. Unfortunately, travel qualms and medical mishaps can happen to anyone, anytime and in any place.
Perhaps your luggage didn’t make it onto your connecting flight or you missed your flight home because or bad weather. You may have even hurt yourself while heading down some steps.
Accidents and mishaps happen, they are unavoidable. The best way to handle situations like these is to purchase some form of travel insurance.
First, check with your usual provider to see if they offer an international insurance plan you can tack onto your current plan. If they do not provide this, you’ll have to research travel insurance companies.
There a a ton of companies out there but I personally use Travel Guard and have used them for several of my trips. Their site is easy to navigate and I got a quote quickly. I also loved that I was able to make changes directly online to my policy.
While I’ve not had to utilize their services while abroad, a fellow traveler, who also had Travel Guard, did.
His bags were lost in transit and he had nothing but what he was wearing & some light toiletries in his carry on. Thankfully Travel Guard was quick in getting him insurance money to buy clothing & necessities while the airline tracked down his luggage.
Most travel insurances will also cover medical but you’ll want to read the fine print thoroughly. Some international insurers have travel and medical separately so be careful of that while shopping around for the best company.

Complete Medical Evaluations and Vaccinations
Wait….what?
Yep, vaccinations are definitely something to add to your To-Do list before heading anywhere outside of your home country.
Even if you’re leery of getting vaccinations, and ultimately decide not to, it’s best to be educated on which diseases are an issue so you can, at minimum, take precautions.
Most countries will provide a list of their standard immunizations for travelers and, while you can discuss not getting the vacs with your doctor, some countries will not let you in without signed documentation that you’ve been properly vaccinated for certain diseases. This is common of lesser developed countries.
For example: Proof of vaccination of Yellow Fever is required for entry into countries like Mali, Ghana, Liberia and Angola.
If you decide to get the vaccinations, the CDC recommends heading to your doctor or a local travel clinic 4-6 weeks before your trip.
If you are pregnant or have a history of illnesses that have weakened your immune system you’ll definitely want to consult your physician about which vaccinations are best for you and if it’s safe for you to travel.
While almost all countries will allow visitors to travel within their borders without receiving vaccinations, you do run the risk of becoming ill on your trip. No one wants that but the decision is ultimately yours alone.
In my honest opinion, I’d rather be safe than sorry so I always get the recommended vaccinations unless my physician says otherwise.

Check International/Travel Advisory Boards
You might think this is overkill but I’ve always believe that being prepared also means being educated.
With that in mind, I usually begin checking Travel.State.Gov about 4 weeks before any trip, just so that I am aware of any potential situations that could arise while I’m at my destination.
Checking out travel advisories when you are considering taking a trip is also a good idea! Travel advisory boards provide detailed information as to the current state of countries you’re interested in visiting & could alter your travel plans.
Travel.State.Gov is my personal desktop go-to for information since it gives travel advisories, notifications, information on local embassies, and more.
There are also plenty of mobile apps out on the market, both for Android and iPhone, which are free to download as well.
I use an app called International SOS Assistance. It uses my GPS to provide up-to-date travel advisory information even if I cross a country’s border.
Remember, travel advisory boards do more than just provide information about social or political unrest. They can also provide information about transportation issues or delays, local protests, and weather delays.
Related: How to Ease Travel Anxiety

Exchange Some Currency
Before you leave for you trip, it’s always smart to exchange some of your national currency for that of your destination.
You need a little foreign currency so that you can book transportation from the airport to your hotel.
There are plenty of places you can exchange currency: banks, currency booths, airports, etc. These places usually carry common currencies like British pounds, Canadian dollars, Chinese renminbi, Japanese yen, so on and so forth.
If you’re heading to a lesser traveled country like Mongolia or Zambia, you might need to contact the bank several weeks ahead of time so they can order those currencies for you.
Check if there is a fee for this before proceeding.
Before handing over your cash, compare the exchange rate at each place. Rates will vary depending on the institution you buy from since they usually ‘hide’ a commission or processing fee in the exchange rate.
For example: your local bank might sell you Euros at a 7% exchange rate which means if you buy $100 USD of Euros then the bank will charge you $7, or $107 USD total.
Pro-tip: I have found that banks offer the best exchange rates & fees – definitely much better than airport exchanges.

Research Where to Purchase SIM Card (If Necessary)
Unless you are shoveling money over for an international plan, you will have to purchase a SIM card once you arrive at your destination (or before if you can).
A SIM card is the small chip inside your cell phone that is used for data storage, like contacts and text messages, and is used to connect to a mobile network like Verizon or AT&T (where data usage comes in).
Without a SIM card, your phone simply will not make traditional calls or text.
Once you have purchased a SIM card from reputable cellular store at your destination, you will need to activate it. Request this service if they don’t immediately do it for you.
Also, be aware that when you’re using a foreign SIM card you will have a new, local phone number. You might want to inform friends and family of this so they’re aware of how to reach you and vise versa, if you need to contact them.
If you would prefer to not change your SIM card you can still use WiFi for most everything else. A lot of hotels typically offer free WiFi but you may want to contact them ahead of time to confirm.
Pre-download applications like Facebook Messenger, Google Hangouts or WhatsApp are super helpful messengers and are free.

Purchase Travel Necessities, Accessories and Snacks
Ever get to the airport and wish you had a neck pillow or one of those soft eye mask? Or how about some snack so you don’t have to spend money on overpriced junk food?
We’ve all been there, especially me who seems to become absolutely famished the moment I pass security.
The weeks leading up to your international flight is a great time to stock up on snacks like nuts, dried fruit and hard candies which don’t have a harsh smell and are easy to travel with.
Pro-tip: Just make sure to gobble everything up before landing – some countries won’t let you bring in food or drinks.
Accessories like neck pillows, eye masks, power converters and cords are definitely must-haves for extended flights! Of course, purchasing these items from Amazon or a local shop can save you a ton of money. I’ve seen airports jack up the prices by 10-20%! Yikes.
If you’re on a budget, look for these items at stores like Ross or Marshall’s where they’ve slashed the prices almost in half.
If you have a friend or family member who travels frequently, perhaps you can borrow their power adapter kit or packing cubes.

Inform Your Bank & Credit Card Company of Travel
Nothing is worse than traveling internationally and having your card declining. It’s certainly embarrassing, yes, but it’s also scary! Especially if you don’t have cash on you.
Most banks have fraud protection and will immediately activate those protections if they see anything out of the ordinary.
For example, if you used your card at a coffee shop in L.A. and 12 hours later buy dinner in Paris, France.
The best way to negate an issue like this is to contact your bank and let them know that you’ll be out of the country. For some banks, that info alone is fine, but for others you may need to provide dates and destinations.
Confirm with your bank as to what their international fees are if you’ll be using a debit card to pull cash from ATMs. Some will have a 2-3% fee, others will have that PLUS an additional $3-$5 service fee.
Unless your bank offers $0 international fees at all ATMs, like a Charles Schwab or Capital One account, you could be hit with $100+ USD of fees.
If you’re on a budget, like me, then something like that could really hit hard.
So, does that mean you shouldn’t use an ATM? No, you certainly can use them! Just be aware of the fee you will have to pay.
Best best practice is to pull out as much as you will need for the duration of your trip. This way you’re only charge the fee once and not each time you got the ATM.
Example: If you take out $1000 USD for a 10 day trip and the fee is 3% + $5. You’ll be expected to pay $35 in fees. If you pulled out $100 USD each day, for 10 days, your fee would be $8/day which totals $80.
$80 is much better in your pocket.
Related: Long-Haul Flight Survival List

BONUS TRAVEL TIP!
So, everything is finally booked! You’ve bought everything you need! You’ve got your passport (and visa if necessary) and you’re now counting down the days until you leave.
One last thing you may want to do before international flight is make sure everything at home is taken care. While it’s not necessary by making sure your home is in order before you leave can help to relieve anxiety and the whole “did I forget something?”
The best way to do this is to write a list of everything you’d normal do during the week.
Items like: grabbing the mail, paying your bills, watering house plants or your garden, anything and everything that should be taken care of while you are away.
If you’re not able to take care of these items ahead of time, recruit the help of a friend or family member to do so.
This way, when you’re sitting comfortably in your seat, jetting off to a far and distant land, you can relax and know that you’re only obligation now is to have a fantastic trip.